Thursday 27 June 2013

Blue

Well, you might be wondering why this is coming out on a Tuesday (aaaand as you're probably all aware, it is not, in fact, Tuesday, but rather Thursday... because the bloggin app on my iPhone apparently doesn't post posts, but rather holds them in complete limbo for, apparently, two day), as opposed to Sunday, and let me tell you... I literally slept all day on Sunday (from when church ended until about 6:30 when Derek and I went to our friends; apparently I was tired. Weird.) and then yesterday I was too busy - you know, doing things like playing Star Wars video games.... Because that's important. 

But I digress; let's just pretend its Sunday and the rest of you are the ones who are off. Today, because we're already doing some time traveling, lets go back in time to when my parents, Elisha and Natalie came to visit. I've had a couple requests (ahem, Rachel) to post on this particular time period and the work we got done, so I figured I'd start hammering those out. Shall we begin with one of the most noticeable? 


Because I'm on my iPhone as I type this, you guys get to see a sort of in between photo, but ignore that and look at the walls. They're yellow. Which isn't THAT bad, but they were really just not jiving with my idea for the house. In fact, Derek and I had decided to take the wall colour in a totally different direction. 

Aka, dark navy/teal. 


Kablam! It's called Regal Wave by CIL, and we got it in the Satin, kitchen and bath finish. 

Natalie and I were the ones to tackle the painting, while everyone else worked on other things. At first we started off with me doing the cutting in and Natalie rolling, but after about five minutes we switched because I really prefer to roll, and she didn't mind. 


It was so wonderful to be painting with another person because as it was, it took us about two days and three and a half coats to finish it completely. It makes sense that it took so long, because this was so far the biggest room we've painted in the house and there was A LOT to work around, cupboards, windows, doorways, etc. 

But while the middle doesn't tend to make much sense, the end result was FANTASTIC. 


We love, love, love how it turned out. We were definitely concerned about going so dark, but thankfully our instincts were right: having two big windows, white cupboards and white floors makes it still really bright in there. And now the cupboards pop so much more! 

As does the various art that we have: 


Oh yeah, and I'm really loving pairing bright lime green with the walls. Yum!


Oh, and check out my FINISHED chalkboard calendar! It looks so great against the dark walls! 

 
Yeah, there really isn't anything written on it, but it looks fantastic! 

So that's our kitchen. Next week: the basement?

Sunday 16 June 2013

Making the Outdoors Pretty

Well, last weekend, Derek and I were at Jeremy and Adrienne's wedding. The wedding was wonderful and Derek looked absolutely smashing in his expensive (rented) Italian suit. While there, I ran into Derek's Aunt Heather who confronted me about my recent lack of blogging. We, together, came to a decision  while yes, I have been rather busy working almost 40 hours a week, I ought not to fall off the entire face of the earth... so, a compromise was in order. One post a week, every Sunday in order to keep me in the habit until life changes in such a way that I'll be able to post a bit more often. So here goes today: the first of (hopefully) many Sundays to come.

Let me begin by introducing you to Chewie (or Chewbacca), an appropriate name not only because he looks like a miniature Wookie (and thus his namesake) and because his favourite activity is to chew on things. Socks and underwear being his favourites.


Chewie is honestly the fluffiest, funniest, craziest, cutest and (often) the most annoying dog Derek and I have ever met. Raising him makes us feel as though we suddenly had a three year old child thrown into our house: he doesn't listen, he sometimes pees on the floor, he's hyper when we want him to be calm, and yet he has all kinds of wonderful moments that fill us with love and make us smile. Like the picture above which I snapped earlier today when he fell asleep on his back next to me.

I have been getting things done around the house as much as I can. For instance: changing out these outdoor lights. When we moved to the house, neither of them worked. It made for a very dark outside. When my dad came for grad, he took a look at them and managed to get the right one working... but not the left. About a week or two later, this happened to the right one:


Making me feel that it was about time to replace them. I mean, one didn't work and now the other one has hanging upside down - and both of them were gross and rusted.


So, off Derek and I went to Canadian Tire to look at their outdoor lights; we found a set that we liked, and after checking around town to make sure there weren't any that we liked better, we bought them. However, as much as I liked the shape and style, I wasn't a huge fan of the colour. So I decided to change that. First things first, I took the glass panels out. At first I had tried to keep them in and just tape over them with flyers and painters tape... But because of the style, it turned out to be super challenging to do it that way. You'll see what I mean in a moment.


Quick side note! One thing I really loved about the lamps was the fact that they had seeded glass panels. I mean, just take a look at this! It's so cool.


I took the actual lamps down to my work space in the basement (and yes, you really ought to do spray painting outside when you can, but unfortunately with the wind in Manitoba it has never worked out well for me, so I've just decided to permanently move my spray painting to the basement) and pulled out the Rustoleum ORB paint that is my favourite. The lamps already had a bit of an ORB finish, but it was a little too brown for me, so I just wanted to darken them a little. This meant that I ended up doing only one or two very thin coats on them.


Then it was time for removing the old ones and installing the new ones - a process that turned out to be rather difficult at times and even took using my reciprocating saw (one of the old screws refused to come out, so I just cut it off) but I was very careful: I disconnected the power to the entire house before I started working - because I wasn't sure which breaker was connected to the outdoor lights and I really didn't want to end up in the hospital after accidentally electrocuting myself.

But I got it finished and eventually things looked like this: and after nine months of living with gross, not working outdoor lights, we finally have some real beauties going on. It gives me hope for our house.


Closeup. 


Here you can see how the cross pieces would have made it rather difficult to do much taping and flyering of the glass.


And while we're talking about outside improvements, check out my gardens that I planted! As I failed so miserably at the whole indoor plant thing, I've decided to try my hand at outdoor plants. Hopefully they'll stay alive a little bit longer.


 And of course the other side, which still needs two more plants, but I'll get to those eventually. The gardens are still doing really well. These photos were taken when I first planted them - a couple weeks ago. We've already had one flower show up: a Siberian Iris (its the spiky, almost grass like plant in the photo above) and right now several of the plants have growing blooms that I expect will burst into flowers any day.


 So, current garden success and I suppose we'll see how things work out with them over the course of the summer.

Monday 8 April 2013

Bathroom Updating

Hi everyone! It's been so long. You have no idea how much I've missed this blogging thing that I used to do. Ever since I was hired at Staples (right before I disappeared) things have been busy. As in "I really haven't even been doing things to improve the house, let alone blog about them" kind of busy.

But I've gotten some easy changes made every here and there, and since I had about half a minute this evening (between getting home from work and eating supper and pizza night) I thought I'd squeeze out a blog post about a couple things we've switched out in the bathroom. And at the same time, share my to-do list for that room. I think because the bathroom is so small, I've focused a lot on it because even simple changes make the whole thing feel different. It's really nice.

First off, I introduced a new handsoap pump! For awhile now, we'd been using soap pumps that Lana, Vickie, and I had bought back in the day from places like Bath and Body Works, but we'd finally run out, so I actually purchased this guy from Walmart, and got some soap (that doesn't stink like soap!) from Superstore. The past two pumps we had were apple scented. And they were nasty. Seriously. They left this apple stench in the bathroom. all. the. time. I actually generally love apple scents, but these two were not nice. So, it's really relieving to have soap that actually has a very gentle, subtle scent again.


Here's another shot. Of course, I went with something white and ceramic-y (technical term), because what else would I do? It was my favourite. Like, I actually spent some serious time considering pumps, both at Superstore and at Walmart, and this was the one I liked. White, simple, ceramic-y, cute little crooked spout. It's great. And you'll notice on the other side of the vanity, that things have been switched up a bit.


That particular corner is semi-constantly being updated. With the starfish-in-jar being pretty much the only thing that stays the same. It went from this:


To this:


To this! The latest update was mostly because I figured what kind of bathroom is complete without kleenex? So, kleenex. And with the added kleenex box, neither of the previous decorations seemed to fit, so I moved in mine and Derek's ring-holding giraffe. He's pretty fantastic.


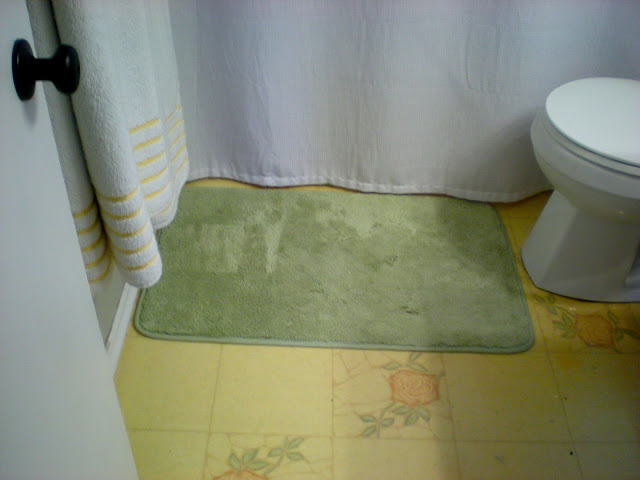
Finally, we switched out our previous bathmat for a new one that actually fits. It's pretty fantastic to not have to have the mat either folded in half, or sitting the wrong way, or bunched up, or something. And this one also has a rubber back, so it doesn't slide around on the ugly linoleum! It's great. :)


As for our to-do list:

- remove window in the shower, and fill in the opening
- raise and even out the shower ceiling
- reglaze tub (in white, not pink!)
- replace shower faucet/handle/spout
- install lights in the shower
- tile shower surround (I'm thinking white subway tile, but we'll have to see!)
- replace rusty curtain rod
- replace plastic curtain rings
- move towel rod closer to shower
- tile floor
- install shoe moulding
- change toilet to eco-friendly dual flush
- replace door (we'd love to change out our old hollow cores to something with a bit more architecture)
- frame out mirror
- remove ceiling light/fix electrical so vanity light turns on with switch by door
- clean and paint air vent behind the toilet
- repaint the doorknob (again; the first time I did, I was impatient and didn't let it dry long enough, so     
  now there are scratches)
- replace vanity
- build wall shelves
- remove old linoleum wall surround, and fix drywall behind
- replace rusty hand towel rod
- paint trim
- remove old second towel rod
- paint room
- and, always, accessorize!

So, it's definitely a pretty hefty list, and we're clearly less than 5% done, but we hardly plan on doing it all at once. It'll be something of a do-as-much-as-we-can-in-stages-before-finally-doing-major-overhaul. But we're excited to see how it goes, and what comes of it. Let the games begin!