This is where my roommates and I store our bobby pins and hair ties - it's an old cardboard soap box. While, sure, it looks fine (I guess) it looks a bit like we just grabbed something that we should have thrown out and we threw our junk into it - which is really what happened.
I, however, decided to do something about the-grabbed-from-the-garbage-look.
And so began my quest! I started with some old sheet music Lana (one of my roomies) and I picked up from MCC and a piece of blue mulberry paper I had lying around. Our bathroom has a sort of blue feel going for it, so I wanted to keep it semi-consistent.
Box was un-boxed (?) and traced out on the sheet music, leaving me with two strangely shaped pieces that I then had to attach to the box.
Hot glue clearly didn't work...
But, in a surprisingly short amount of time, I had completely covered the outside of the box with sheet music and reassembled it - doesn't it look nice?
Then it was on to stage two. I also wanted to make the inside of the box look nice, so our bobby pins and hair ties could have pretty paper to look at as they sat there. Here's where the mulberry paper plays its part in the great tale!
I started off by measuring the inside of the box, figuring out the dimensions: height, width, depth, length, etc. Then, I traced out a picture of what the inside liner would have to look like and put the dimensions in. I made a model on scrap sheet music and then traced it out on the mulberry. Cut that out, and went to fold it into the box... only to realize that I had gotten the dimensions wrong! How even. Trim it down, try to fit it in: it works! Awesome... until I realized that glue and mulberry paper... hate each other.
...nuff said...
So, in the end, I just put down a piece on the bottom of the box and left it at that.
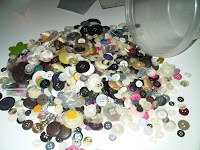
But of course, the finished product was far from finished! So, I created a rolled paper flower from the mulberry paper (though I swore I'd never make any more of those after crafting my Christmas wreath... more later, perhaps?), grabbed some twine, and of course... buttons... I love buttons. :D
Buttons... teehee...
Did I, perchance, mention that I like buttons? Oh, probably not, so I'll say it again... BUTTONS. They're just so cute! And there are so many colours, and they go with everything... See, just look at this button butterfly that I created on the box. It goes so well! And since butterflies are becoming a thing in my bathroom, it goes well... This butterfly isn't yet finished, so keep reading to see it done! I must say, there is only one bad thing about buttons: wanting two that match and not being able to find a second one.
Anyway, so after all the buttons, I managed to complete our little hair tie/bobby pin box. Isn't is cute? I think it goes perfectly with the rest of our eclectic, college student-esque house.
And of course, pictures of it in the bathroom. Note how well the blue mulberry flower goes with our Chinese fan! Awesome...
And total cost for it: $0.... ...I had everything already! Yay, DIY.


Very creative! You might like to see two interesting boxes that I made:
ReplyDeletehttp://www.youtube.com/watch?v=zrVzbIe8VmQ
http://musingsofanoddsock.blogspot.com/2011/02/cardboard-boom-box.html
Guess where the boom box came from? Yes, GRANNY'S POULTRY!